
Happy New Year!! I can’t believe that it’s 2015 already…yikes! I hope that you all had a safe and enjoyable New Year’s Eve, ours involved eating dinner in and being asleep before the ball dropped…we’re party animals for sure. 😉
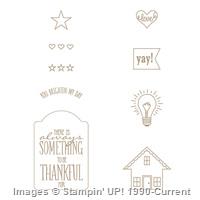
I used the Sale-a-bration exclusive stamp set from Stampin’ Up! called You Brighten My Day for my card today. I added a little sunburst effect on the background and I’ve got some pictures below to show you how I created it.

The colors for my card were inspired by Sunday Stamps SSC91.

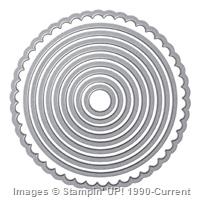
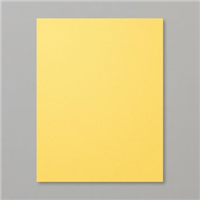
I started by cutting a 3-7/8″ x 3-7/8″ square from Whisper White card stock. I cut a second square from scrap paper the exact same size and I cut the center of the scrap paper square out with one of the Circles Collection Framelits Dies.

I marked an “x” in the center of my Whisper White card stock so that I’d have a starting point, then I used Blue Painters Tape to adhere the scrap paper that I’d cut with the circle over the top of my Whisper White panel. I made sure that the edges were lined up and both layers were securely taped so that neither shifted when I was creating the sunburst.

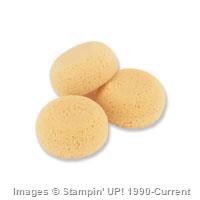
To create the sunburst effect, I took a strip of scrap card stock and I placed it so that it was lined up with the “x” in the center and overlapped the edge. I used Daffodil Delight ink and I sponged from the strip of card stock onto the Whisper White panel. I moved the card stock strip about 1/4″ at a time around the edge, keeping the center lined up with “x” (sort-of like the hands on a clock) and I continued to sponge the lines until I’d filled in the entire circle.

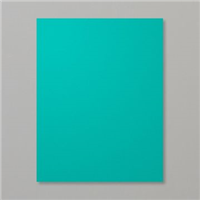
I removed the scrap paper from the panel, adhered the panel to a Daffodil Delight card stock panel with SNAIL, then to a Bermuda Bay card base with Stampin’ Dimensionals.

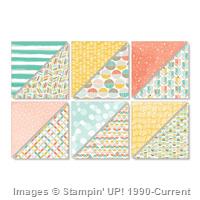
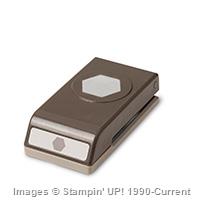
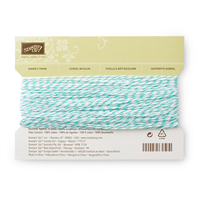
I adhered a strip from the Best Day Ever DSP (Sale-a-bration item available Jan 6) that I’d punched with the Hexagon Punch to the card front with SNAIL, then scrunched up a strand of Bermuda Bay Baker’s Twine and I taped it over the center of the card.

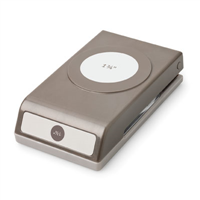
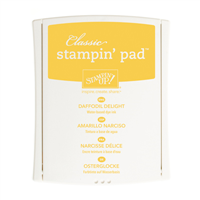
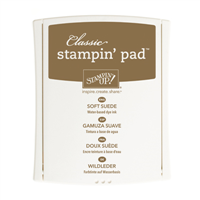
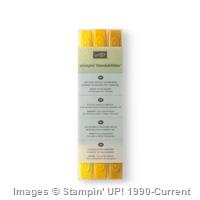
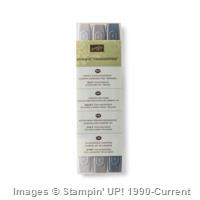
I stamped the lightbulb image from the You Brighten My Day stamp set (Sale-a-bration item available Jan 6) in Soft Suede ink and I colored it with my Daffodil Delight and Smoky Slate Stampin’ Blendabilities Markers. I stamped the sentiment from the You Brighten My Day stamp set in Bermuda Bay ink above the lightbulb, then punched the sentiment out with the 1-3/4″ Circle Punch.
I sponged the edges of the circle with Daffodil Delight ink, then adhered it with SNAIL to a circle that I’d cut with a Circles Collection Framelits Die from Daffodil Delight card stock. I adhered the layered circle to the card front with Stampin’ Dimensionals then added three Rhinestone Basic Jewels to finish the card front.

I adhered a strip of the leftover Best Day Ever DSP to a Whisper White panel inside the card.
You can find a complete list of supplies for this project , including card stock cuts, at the very bottom of this post.
January 1-15 Hostess Code: DKE9G34U
Use this hostess code when you order and receive a free gift from me! If your order is over $150, please do not use this code, but you’ll still get the free gift. The free gift for January is your choice of any item valued up to $8.95 in either the 2014-15 Annual Catalog or the 2015 Occasions Catalog!
Just a Few Days Left to Join – Stamp With Amy K – 2015 Occasions Catalog Shares

Would you like all of the great new designer papers, ribbon and embellishments in the 2015 Occasions Catalog but can’t afford everything? Join my share! I’m placing an order on January 6 and I’m going to 3-day ship it so I should be able to have the shares cut, bundled and in the mail to you around January 13.
You can see all of the details and find a sign-up form by clicking here or on my 2015 Occasions Catalog Shares page at the top. Let me know if you have any questions.
Weekly Deals From Stampin’ Up! Dec 30-Jan 5
Here are this weeks Weekly Deals:

Click here to see the Weekly Deals from Stampin’ Up! in my online store. The Weekly Deals are only while supplies last and only available at these great prices through January 5.
If you need any stamping supplies, I’d be very happy to be your Demonstrator. Just click on the Order Stampin’ Up! Online Now button on the right side of the screen to go directly to my online store or drop me an email if you have any questions. Happy Stamping!

- Visit my online store here.
- Shop the Clearance Rack here.
- Earn FREE Stampin’ Up! Products – Join my Running Shoe Rewards Program – My online customer thank you program!
- In addition to my online store, also take PayPal payments for orders – Check my Rewards page for more information.
- I offer gift certificates for Stampin’ Up! merchandise too! Click on my Gift Certificates page for more information.
- Bermuda Bay – 4-1/4″ x 8-1/2″ card base
- Daffodil Delight – 4″ x 4″ square, Circles Collection Framelits die cut
- Whisper White – 1-3/4″ Circle Punch, 3-7/8″ x 3-7/8″ square, 4″ x 4″ square (inside card)
- Best Year Ever Designer Series Paper – 1″ x 3-1/2″ strip, 1″ x 2-1/2″ strip (inside card)
Stampin’ Up! items used to create this project:


Built for Free Using: My Stampin Blog

This is really cute, Amy! Thank you for giving explicit details! What a fun card…sure to “brighten” someone’s day~
Thanks so much Roberta!! 🙂
What a perfect way to start the year……full of joy and sunshine! Love how you made the sunburst!
Thanks so much Linda! Glad that you liked it. 🙂
Cute card! Happy New Year, Amy, with thanks for being a great SU demonstrator.
Thanks so much for your kind comments Diane. That made me smile this morning. 🙂
This is so cheerful! Thanks, Amy
Thanks so much Maggie!! 🙂
This is so fun, bright and cherry, Amy! I’m going to give this a try! Happy New Year!
Thanks so much Dawn, it’s a really simple technique! Have fun. 🙂
After reading your tutorial, I saw this card in a whole new light. You put a lot of elbow grease into this. This is cute! Thanks for sharing the idea. Happy New Year!
Thanks Terri! It’s actually a pretty quick process, since you want the sponging to look a little uneven just sponge a touch at each turn. 🙂
Thanks for the clear directions on how to make that fun sunburst for the background! Cute card, too.
Thanks so much for stopping by to leave a comment. Glad that you liked the extra instructions. 🙂
Thanks for the instructions on this fun sunburst technique. Made for your lovely card. Turned out beautiful. I just got back from our little get away new years trip and I am sorry to have missed the free shipping. Oh well … there is always a next time 🙂
Happy New year to you Amy.
Thanks so much Amy, glad that you liked my card. 🙂 Sorry that you missed my free shipping offer too…I sort-of decided at the last second to do it.
That fun sunburst is perfect with the image! Love the added embellishments too. Thanks so much for joining us at Sunday Stamps!
Thanks so much for stopping by to leave a comment! 🙂
Amy, what a wonderful card! Really like the sunburst effect! Great embellishments. Thanks for joining us at Sunday Stamps with this beauty.
Thanks so much for stopping by to leave a comment! 🙂
I simply adore your card, Amy! That starburst is so cool…great tips for creating it too! I might just have to give it a go! Thanks for joining us this week at Sunday Stamps 🙂
Thanks so much for stopping by to leave a comment!! 🙂
Super cute card – love the technique! Thank you for sharing the instructions!
Thanks for stopping by to leave a comment!