
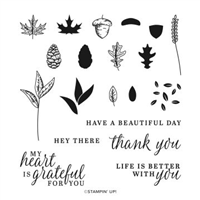
I used the Stampin’ Up! Beautiful Autumn stamp set and the Floating & Fluttering stamp set bundle to create a thank you card to share with you today. I also did a video tutorial for this project and you can see it on my Facebook page here and on my YouTube channel here.

My card design was inspired by the Fusion Sketch Challenge this week.

I started by adhering two panels from the Fine Art Floral DSP (available Jan 5) to the top and bottom of a Petal Pink card front with Stampin’ Seal. Then I adhered another panel from the Fine Art Floral DSP to a panel from the Brushed Metallic 12″ x 12″ Card Stock and then adhered the layered panel to the card front with Stampin’ Seal.

I adhered a length of Fine Art 3/8″ Ribbon (available Jan 5) to the card front in a “z” with Stampin’ Seal. Then I stamped the sentiment from the Beautiful Autumn photopolymer in VersaMark Ink on a panel of Whisper White card stock, sprinkled it with Gold Stampin’ Emboss Powder and then heat embossed it. I stamped the frame from the Floating & Fluttering stamp set (available Jan 5) in Petal Pink ink around the sentiment and then cut it out with the coordinating die from the Fluttering Dies (available Jan 5). I adhered the die cut sentiment to the card front with Stampin’ Dimensionals.

I cut a panel of Bumblebee card stock with one of the Fluttering Dies and then sponged the edges with Flirty Flamingo ink and a Sponge Dauber. I adhered the butterfly with a Glue Dot to the sentiment and then added a Gold Glitter Enamel Dot to finish the card front.

I stamped the butterfly images from the Floating & Fluttering stamp set in Flirty Flamingo and Petal Pink inks on a panel of Whisper White card stock and then cut them out with one of the Fluttering Dies. I adhered the butterflies with Stampin’ Seal and then trimmed the edges to finish the inside of the card.
You can see a list of supplies used to create this project, including the card stock cuts, at the very bottom of this blog post.
You can see the YouTube video tutorial for this project here:
If you’d prefer to watch the video on Facebook, you can see it here.
I’ve created a printable PDF with written instructions and a list of products used to create this project. You can download, print and/or save it by clicking this image:

December 1-15 Host Code: UY6PTURQ
Use this host code when you order $50 or greater and receive a free gift from me! If your order is over $150, please do not use this code, but you’ll still get the free gift. The free gift is your choice of any item valued up to $10.00 in the 2020-21 Annual Catalog or August-December 2020 Mini Catalog! That includes some of the Host Exclusive stamp sets! See my Rewards page for full details.
***Make sure that you can see my name on the final checkout page listed as your Demonstrator when you order so that you know that you’re ordering with me and you’ll get my rewards! 🙂
January-June 2021 Mini Catalogs & Sale-a-bration Brochures Coming Soon!!

Woohoo!!! The new January-June 2020 Mini Catalog & 2021 Sale-a-bration Brochure will be shipping out soon!
If you’ve ordered from me within the last year, you will automatically be on my mailing list to receive a new catalog! I’ve ordered the catalogs and I’ll be packing them up and shipping them back out just as soon as they arrive.
If you are not a current customer of mine but would like to be and want a copy of the upcoming catalog, drop me a note with your mailing address to: amy@stampwithamyk.com or fill out my catalog request form here and I’ll pack up a catalog for you too! Please note, I can only ship catalogs to addresses within the United States.
FREE Bonus Quite Curvy and Curvy Christmas Project Tutorials With Videos When You Purchase The Bundle From Me!!

A group of us worked together to create five awesome tutorials using the Curvy Celebrations special release products with video tutorials! You can get this set of exclusive tutorials when you purchase either the Quite Curvy Variety Bundle (item 158396) or the Quite Curvy Bundle (item 156228) from me between now and January 4!
If your order is $50 or greater and includes either of these bundles, you will get this set of tutorials in addition to the monthly online class tutorials AND your $10 thank you gift! And you’ll also earn my Running Shoe Reward Points! Yippee!!
Head over to my online store to start shopping these great products now!
If you need any stamping supplies, I’d be very happy to be your Demonstrator. Just click on the Order Stampin’ Up! Online Now button on the right side of the screen to go directly to my online store or drop me an email if you have any questions. Happy Stamping!

- Visit my online store here.
- Shop the Clearance Rack here.
- Earn FREE Stampin’ Up! Products – Join my Running Shoe Rewards Program – My online customer thank you program!
- In addition to my online store, also take PayPal payments for orders – Check my Rewards page for more information.
- I offer gift certificates for Stampin’ Up! merchandise too! Click on my Gift Certificates page for more information.
- Follow me on:
![]()
![]()
![]()
![]()
Card stock cuts for this project:
- Petal Pink – 4-1/4″ x 11″ card base scored at 5-1/2″
- Bumblebee – Fluttering die cut
- Whisper White – Fluttering die cut, 4″ x 5-1/4″ panel (inside card)
- Fine Art Floral Designer Series Paper – two 1″ x 4-1/4″ panels, 4″ x 4-1/4″ panel
- Brushed Metallic 12″ x 12″ card stock – 4-1/4″ x 4-1/4″ panel
Stampin’ Up! products used to create this project:


what a pretty card, reminds me of spring which seems so far off right now, LOL
Thanks Sandi! Hahaha…it will be here before we know it. 😉
It’s a beautiful card. Love the design, colors and DSP.
Thanks Karen! 🙂
This card is absolutely stunning! I love the colors and design!
Thanks Karen! 🙂
You are right – that paper is lovely! You made a beautiful card with it~
Thanks Linda! 🙂
Such a lovely card, Amy! The paper is beautiful and the layout is perfect!
Thanks Melanie! 🙂
Such a lovely card! The addition of the butterfly is perfect!
Thanks Mary! 🙂
This is such a beautiful and elegant card. Great way to use the sketch. I love the ribbon behind your sentiment panel. Thanks for joining us at The Fusion Card Challenge. Claire DT
Thanks for stopping by to leave a comment! 🙂