

I used the Stampin’ Up! Happy Hibisus stamp set bundle from the Online Exclusives to create my project for the Happy Inkin’ Thursday Blog Hop. We’ve got a sketch challenge this week and this is what I made for it.

Here is the sketch that we’re all using this week:

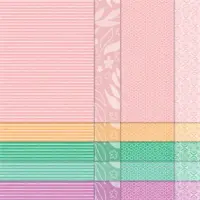
I started by adhering a panel of Peach Pie patterned paper from the 2024-2026 In Color 6″ x 6″ DSP to the front of a Peach Pie card base with Multipurpose Liquid Glue. Then I cut a panel of Peach Pie card stock with one of the Textured Notes Dies (Online Exclusive item) and then adhered a panel of Wood Textured Specialty Paper with Stampin’ Seal to the die cut. I adhered the layered panel to the card front with Stampin’ Dimensionals.

I cut panels of Old Olive and Lemon Lolly card stocks with the leaves and flowers dies with the Happy Hibiscus Hybrid Embossing Folder Dies (Online Exclusive item). Then I stamped the lined flower image from the Happy Hibiscus photopolymer stamp set (Online Exclusive item) in Peach Pie ink on a panel of Basic White card stock. Then I inked the fill-in images from the Happy Hibiscus stamp set in Peach Pie ink, stamped them on scrap paper and then stamped the over the lined images on the Basic White panel. I cut and embossed the floral images with the Happy Hibiscus 3D Hybrid Embossing Folder and Dies and then adhered the die cuts to the card front with Mini Glue Dots.

I stamped the sentiment from the Happy Hibiscus stamp set in VersaMark ink on a panel of Peach Pie card stock, sprinkled it with white embossing powder from the Basics Wow! Embossing Powder and then heat embossed it. I cut the sentiment out with one of Happy Hibiscus Hybrid Embossing Folder Dies and then adhered the die cut sentiment to the card front with Stampin’ Dimensionals. I adhered the final flower with Stampin’ Dimensionals and then added three Peach Pie gems from the 2024-2026 In Color Shimmer Gems to the flower centers to finish the card front.

I adhered a strip of Peach Pie DSP to a panel of Basic White card stock to finish the inside of the card.
You can see a list of supplies used to create this project, including the card stock cuts, at the very bottom of this blog post.
Alright, on with the hop! Click the button below to hop over to see what Mary Deatherage has created today.

And just in case you get lost along the way, here is a list of the team members involved in the hop today:
- Amy Koenders – You Are Here
- Mary Deatherage
- Karen Finkle
- Akiko Sudano
- Karen Ksenzakovic
- Tara Carpenter
- Terry Lynn Bright
I’ve created a printable PDF with written instructions and a list of products used to create this project. You can download, print and/or save it by clicking this image:

March 16-31 Host Code: HH6HZVSX
Use this host code when you order $50 or greater and receive a free gift from me! If your order is over $150, please do not use this code, but you’ll still get the free gift. The free gift is your choice of any item valued up to $10.00 in either the 2024-2025 Annual Catalog or January-April 2025 Mini Catalog! See my Rewards page for full details.
Orders of $50+ placed through my online store also get my card class tutorials for the month! You can see the details on my Rewards page.
***Make sure that you can see my name on the final checkout page listed as your Demonstrator when you order so that you know that you’re ordering with me and you’ll get my rewards!
If you need any stamping supplies, I’d be very happy to be your Demonstrator. Just click on the Order Stampin’ Up! Online Now button on the right side of the screen to go directly to my online store or drop me an email if you have any questions. Happy Stamping!

- Visit my online store here. Or scan the QR code below to go right to my online store via mobile device:

- Shop the Last Chance Products here.
- Earn FREE Stampin’ Up! Products – Join my Running Shoe Rewards Program – My online customer thank you program!
- Interested in purchasing a Starter Kit so that you can save at least 20% on every order that you place? Check out the details here.
- In addition to my online store, also take PayPal payments for orders – Check my Rewards page for more information.
- I offer gift certificates for Stampin’ Up! merchandise too! Click on my Gift Certificates page for more information.
- Follow me on:
![]()
![]()
![]()
![]()
Card stock cuts for this project:
- Peach Pie – 4-1/4″ x 11″ card base scored at 5-1/2″, Happy Hibiscus die cut, Textured Notes die cut
- Old Olive – six Happy Hibiscus die cuts
- Lemon Lolly – three Happy Hibiscus die cuts
- Basic White – Happy Hibiscus die cut, 4″ x 5-1/4″ panel (inside card)
- 2024-2026 In Color 6″ x 6″ Designer Series Paper – 4-1/4″ x 5-1/2″ panel, 1/2″ x 4″ strip (inside card)
- Wood Textured Specialty Paper – 3-3/8″ x 5″ panel
Stampin’ Up! products used to create this project:


Price: $12.50


So pretty Amy! Love the new rectangle die frame! 😊
Thanks Akiko! 🙂
WOW!! Gorgeous card Amy 🙂 Love the colors and Hibiscus is one of my favorite flowers
Thanks Karen! 🙂
wow this is lovely pretty colors and great layout
Thanks Sandi! 🙂
Gorgeous card! I love all the layers! TFs
Thanks Tara! 🙂
Pretty card – love the! colors
Thanks Terry Lynn! 🙂
Wow this card looks fantastic in peach, one of my favorites colors!!!!! And love that you used the 6 x 6 In-Color dsp, as I need to use it up way more than I have been!!!! Gorgeous card!!!!!! Can’t wait to make it!!!!!! TFS!
Thanks Lisa! 🙂
Hi Amy, This card just jumped out at me! It is so pretty and cheerful. Just right after a long gray winter. I did my best to make four of them to send to friends/family following your sample. Thank you SO MUCH!
Thanks Angie! 🙂
That’s gorgeous!
Thanks Deborah! 🙂