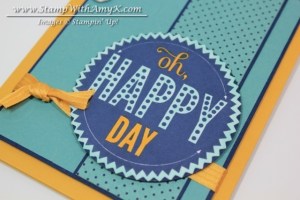
I used the Starburst Sayings and matching Starburst Framelits Dies to create my card to share today. I played a little with the Coastal Cabana and Daffodil Delight Blendabilities too. 🙂

My card design was inspired by Retrosketches #121.
I started by embossing a panel of Lost Lagoon card stock with the Large Polka Dots Embossing Folder. I used the Envelope Punch Board to round the corners of the panel, then adhered it with SNAIL to a panel of Night of Navy card stock that I’d also punched with the Envelope Punch Board.

I adhered a strip of Flowerpot DSP to a strip of Night of Navy card stock, then to the embossed panel with SNAIL. I tied a piece of Hello Honey 3/8″ Stitched Satin Ribbon around the panel and adhered it with SNAIL.

I stamped the Starburst Sayings sentiment in Night of Navy ink on a Whisper White panel and cut it out with the Starburst Framelits Die. I gave it a few minutes to dry completely, then I colored the letters and around the edges with my Coastal Cabana Light and Daffodil Delight Dark Stampin’ Blendabilities Markers.

I adhered the stamped die cut to a Circles Collection Framelits die cut from Night of Navy card stock with SNAIL, then adhered the layered sentiment to the panel with Stampin’ Dimensionals. I added 3 Basic Metal Buttons to the panel, using Glue Dots to adhere them. Then I adhered the completed panel to a Hello Honey card base with Stampin’ Dimensionals.

I finished the inside of the card by adhering a strip of Flowerpot DSP to a Whisper White panel with SNAIL.
You can find a complete list of supplies, including card stock cuts, at the very bottom of this post.
July 1-15 Hostess Code: ZZDRPDQ3
Use this hostess code when you order and receive a free gift from me! If your order is over $150, please do not use this code, but you’ll still get the free gift. The free gift for July is an Embossing Folder of your choice. You may choose any one of the embossing folders in the 2014-15 Annual Catalog (you can find them on pages 226-227)!
Buy 3 Get 1 Free on Designer Series Paper During July
During the entire month of July, when you purchase three Designer Series Paper packs, you’ll get one free! Click here to head over to my online store to see the papers available on the Buy 3 Get 1 Free sale.
Weekly Deals From Stampin’ Up! July 1-7
Here are this weeks Weekly Deals:

Click here to see the Weekly Deals from Stampin’ Up! in my online store. The Weekly Deals are only while supplies last and only available at these great prices through July 7.
If you need any stamping supplies, I’d be very happy to be your Demonstrator. Just click on the Order Stampin’ Up! Online Now button on the right side of the screen to go directly to my online store or drop me an email if you have any questions. Happy Stamping!

- Visit my online store here.
- Shop the Clearance Rack here.
- Earn FREE Stampin’ Up! Products – Join my Running Shoe Rewards Program – My online customer thank you program!
- In addition to my online store, also take PayPal payments for orders – Check my Rewards page for more information.
- I offer gift certificates for Stampin’ Up! merchandise too! Click on my Gift Certificates page for more information.
- Hello Honey – 4-1/4″ x 11″ card base
- Night of Navy – 3-3/4″ x 5″ panel, 1-5/8″ x 5″ strip, Circles Collection Framelits die cut
- Lost Lagoon – 3-5/8″ x 4-7/8″ panel
- Whisper White – Starburst Framelits die cut, 4″ x 5-1/4″ panel (inside card)
- Flowerpot Designer Series Paper – 1-1/2″ x 5″ strip, 1/2″ x 4″ strip (inside card
Stampin’ Up! items used to create this project:


Ohh I really like this! Colors and layout are perfect!
Thanks so much, it was quick and easy too! 🙂
Another awesome color combo, so bright and cheery! Thanks for sharing.
Thank you Terri! 🙂
Nice use of new products and love the offset layout. Thanks for sharing your many creations!
Thanks so much! 🙂
What a fun and happy card! I’m definitely going to CASE this for one of the birthdays I’ve got coming up, yay 🙂 Also love the tip about being able to use the Blendabilities with the SU ink. I didn’t know that and it adds the perfect finishing touch 😉
Thanks so much Jill! Have fun coloring with the Blendabilities. I’m not sure if you’d actually be able to blend with them and have it not start mixing the ink in with it, but if you’re just going to quickly color something they work great! Just make sure that the ink is really dry before you start. 🙂
Thanks for the advice Amy, definitely going to try it!
Have fun!! 🙂