
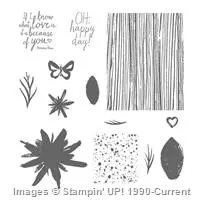
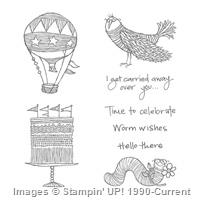
I used the Build a Bouquet and Time To Celebrate (Host Exclusive) stamp sets and the Bouquet Bigz L Die from Stampin’ Up! to create my card today. This is one of those cards that would definitely need to be hand delivered…unless you wanted to mail it in a box! 🙂

My card design was inspired by Freshly Made Sketches #170.
 And the colors for my card were inspired by ColourQ Challenge 276.

I started by stamping a panel of Crumb Cake card stock with the woodgrain image from the Build a Bouquet photopolymer stamp set in Chocolate Chip ink. I cut the panel into two pieces, then adhered the pieces with SNAIL to a panel of Chocolate Chip card stock.

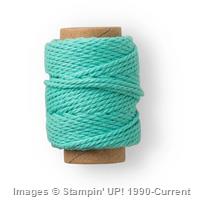
I wrapped a strand of Coastal Cabana Thick Baker’s Twine around the panel and tied a bow, then adhered the layered panel to a Coastal Cabana card base with Stampin’ Dimensionals.

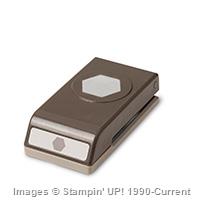
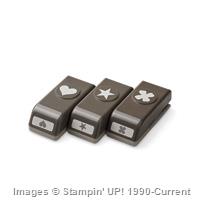
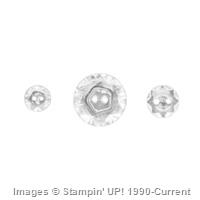
I stamped the sentiment from the Time to Celebrate Host Exclusive stamp set in Coastal Cabana ink on a strip of Crumb Cake Card Stock, punched the end with the Hexagon Punch to create the banner and adhered it with SNAIL to the card front. I punched a flower from Strawberry Slush card stock with the punch from the Itty Bitty Accents Punch Pack, adhered it with a Glue Dot to the banner, then added a Daffodil Delight Candy Dot from the Brights Candy Dots pack to the center.

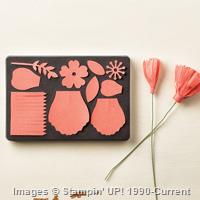
To make the flower, I started by cutting the flower petals from Strawberry Slush card stock with the Bouquet Bigz L Die. I turned the petals so that the backs were facing me and I used my Bone Folder to curl the petals up and to round them just a bit on the edges.

Then I turned the petal back upright and placed a Glue Dot on the top side of one of the tabs. I crossed the other tab over the Glue Dot and adhered it to create the finished rounded petal.
A few tips: The more you cross the two tabs, the more curved your flower petal will be. So if you want a more flat flower, just barely cross the tabs. For a fuller flower, cross the tabs at least half way. I also tried to use Multipurpose Liquid Glue to adhere the tabs, I didn’t have a lot of luck with that adhesive. I ended up with very sticky fingers and the flowers popped apart because my gluey fingers were stuck to them. I had very good success using Glue Dots, so I’d recommend them as your adhesive for this project.

Once I had the petal tabs all adhered, I started adhering the flower together. I used Glue Dots and I adhered the bottom 5 petals together, then I added a second row of 5 petals over the top.

I adhered the flower to the card front, then adhered the flower center die cut from Daffodil Delight card stock with Glue Dots. I tied a strand of Whisper White Baker’s Twine through a Vintage Faceted Designer Button and adhered it over the flower center to complete the card front.

I stamped the butterfly image from the Build a Bouquet stamp set in Coastal Cabana ink on a Whisper White panel inside the card.
You can find a complete list of supplies, including card stock cuts, at the very bottom of this post.
January 16-31 Hostess Code: VZD74WFK
Use this hostess code when you order and receive a free gift from me! If your order is over $150, please do not use this code, but you’ll still get the free gift. The free gift for January is your choice of any item valued up to $8.95 in either the 2014-15 Annual Catalog or the 2015 Occasions Catalog!
Heirloom Productions Rubber Stamp & Paper Arts Festival – Jan 31 & Feb 1

For those of you in and around the Altanta, GA area I will have a table at the Heirloom Productions Rubber Stamp & Paper Arts Festival on Jan 31 & Feb 1, 2015. You can see more information about this event by clicking here. Hope to see you all there!
Weekly Deals From Stampin’ Up! Jan 20-26
Here are this weeks Weekly Deals:

Click here to see the Weekly Deals from Stampin’ Up! in my online store. The Weekly Deals are only while supplies last and only available at these great prices through January 26.
If you need any stamping supplies, I’d be very happy to be your Demonstrator. Just click on the Order Stampin’ Up! Online Now button on the right side of the screen to go directly to my online store or drop me an email if you have any questions. Happy Stamping!

- It’s Sale-A-Bration Time!! Earn a free item for every $50 that you purchase. Click here to read all about it.
- Visit my online store here.
- Shop the Clearance Rack here.
- Earn FREE Stampin’ Up! Products – Join my Running Shoe Rewards Program – My online customer thank you program!
- In addition to my online store, also take PayPal payments for orders – Check my Rewards page for more information.
- I offer gift certificates for Stampin’ Up! merchandise too! Click on my Gift Certificates page for more information.
- Coastal Cabana – 4-1/4″ x 11″ card base
- Chocolate Chip – 4″ x 5-1/4″ panel
- Crumb Cake – 3-7/8″ x 5″ panel cut at 1-5/8″, 5/8″ x 2-1/2″ strip
- Strawberry Slush – ten Bouquet Bigz L die cuts, Itty Bitty Accents Punch Pack punch
- Daffodil Delight – Bouquet Bigz L die cut
- Whisper White – 4″ x 5-1/4″ panel (inside card)
Stampin’ Up! items used to create this project:


Built for Free Using: My Stampin Blog

So pretty! These colors are gorgeous. Boo-hoo, most of my cards have to be mailed.
Thank you Melanie, most of mine have to be mailed too…but I figured that this one would be nice for the rare occasion when I hand deliver something. 🙂
Great color combo! Thanks for the tips on making the flower. Very pretty card!
Thanks Terri! Have fun making your flowers. 🙂
Wow Amy! Your card is so beautiful!! I had no idea that this set had so much in it, I thought it was very small images. The wood grain background came out so nice, it is different than the woodgrains that we have now too. Your flower is awesome! I love your tip for putting it together, I can just imagine the sticky fingers, lol 😉 The button middle with the stamen just finishes it off so well. I really like the way you left a little bit space in the middle of the panel and then finished it off with the CC bakers twine.
Do you think if the flower were made a little flatter, would it mail a little better? This is really an awesome card, Amy 🙂
PS: I did get a few cards made yesterday and it felt great! So happy 🙂 First time in ages!
Thanks Jill! I was pleasantly surprised with the images in this set, they are much bigger than they appear in the catalog. The flower could definitely have been made flatter so that you could mail it. If I’d curled the petals back rather than up, that would have made a big difference and if I hadn’t pulled the tabs so far across, that would have made the petals flatter too. Glad to hear that you got a few cards made! 🙂
Gah, there you go, adding to my shopping cart again 😉 I really liked the images and to see them on a full card, just fantastic visual. Great tip for curling backwards, I didn’t think about that idea and it would be perfect. How large is the splatter stamp?
The splatter stamp is smaller than the woodgrain, it measure about 2.5″ x 2.25″. 🙂
Thanks 🙂
Great card, Amy. I love the colors and the woodgrain background. Thanks for playing along with us at FMS this week!
Thanks so much for stopping by to leave a comment! 🙂
Oh I love that stamped background! I thought it was DP when I first saw it. And the bloom is just gorgeous…definitely need to hand deliver that one! Thanks for playing along at Colour Q!
Thanks for stopping by to leave a comment! 🙂