
 Welcome to the Ink it! Stamp it! Blog Hop! I was so honored when Carolina Evans asked me to join this international design team blog hop. This is a group of amazing stampers so be sure to hop through the full line up below so that you can see all of the projects!
I chose to use the Peaceful Place stamp set and I did a little watercoloring with a Blender Pen for my project.

I started by stamping the image from the Peaceful Place stamp set in StazOn Jet Black ink on a panel of Watercolor Paper. I used my Stampin’ Write Markers in the following colors to add some ink to the image: Coastal Cabana, Pool Party, Sahara Sand, Gray Granite, Pear Pizzazz, Shaded Spruce, Crumb Cake and Mossy Meadow.

Once I had the basic color on the panel, I used a Blender Pen and colored over the image to soften the lines and do a little shading. After I’d finished coloring, I adhered the “framing” around the edges with Multipurpose Liquid Glue. The frame was cut from a panel of Wood Textures DSP. Once I had the frame adhered, I adhered the watercolor panel to a Shaded Spruce card base with Stampin’ Dimensionals.

I stamped the sentiment from the Enjoy Life photopolymer stamp set in VersaMark Ink on a panel of White Vellum card stock, sprinkled it with Black Stampin’ Emboss Powder and heat embossed it. I punched the bottom of the panel with the Banner Triple Punch and then adhered it with Glue Dots hidden under the button. I tied a bow with Linen Thread through a True Gentleman Button and adhered it with a Glue Dot to the sentiment banner to finish the card front.
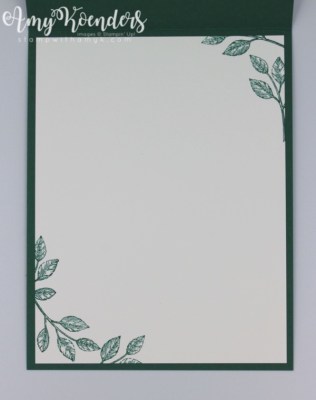
I stamped the leaves from the Peaceful Place stamp set in Shaded Spruce ink on a panel of Whisper White card stock to finish the inside of the card.
Thank you so much for joining us today. We hope you’ll join us again next month to see our technique based projects. I’m Amy Koenders and to keep hopping around see the list below to see who is up next.
June 16-30 Host Code: 37VGUYHK
Use this host code when you order and receive a free gift from me! If your order is over $150, please do not use this code, but you’ll still get the free gift. The free gift is your choice of any item valued up to $10.00 in the 2018-19 Annual Catalog! That includes some of the Host Exclusive stamp sets! See my Rewards page for full details.
My card was inspired by Global Design Project #GDP143. I love this stamp set and the clean designs that you can create with it!
 And it also works with the “fresh” theme for As You See It Challenge #178. Definitely fresh air!

If you need any stamping supplies, I’d be very happy to be your Demonstrator. Just click on the Order Stampin’ Up! Online Now button on the right side of the screen to go directly to my online store or drop me an email if you have any questions. Happy Stamping!

- Visit my online store here.
- Shop the Clearance Rack here.
- Earn FREE Stampin’ Up! Products – Join my Running Shoe Rewards Program – My online customer thank you program!
- In addition to my online store, also take PayPal payments for orders – Check my Rewards page for more information.
- I offer gift certificates for Stampin’ Up! merchandise too! Click on my Gift Certificates page for more information.
Card stock cuts for this project:
- Shaded Spruce – 4-1/4″ x 11″ card base
- Whisper White – 4″ x 5-1/4″ panel (inside card)
- Wood Textures Designer Series Paper Stack – two 5/8″ x 5-1/4″ strips, two 5/8″ x 4″ strips
- White Vellum – 2″ x 3-1/2″ panel
- Watercolor Paper – 4″ x 5-1/4″ panel
Stampin’ Up! items used to create this project:


Thank you so much for joining us Amy – gorgeous card too, I’m sure this set will be very popular!
Thank you for the invite Carolina! 🙂
Lovely, Amy! I especially love the way you’ve been bold with the statement in the top right hand corner.
Thank you Fiona! 🙂
Wow, Amy, what a stunning card!! Beautiful job.
Thank you Connie! 🙂
Thank you, Amy – I’m so excited to see this stamp set in use. It’s on my wish list but I’ve been procrastinating a bit. I just love what you’ve created with it! It’s so great to have you on the team!!
Thanks so much Stephanie! So glad to be hopping with you all! 🙂
wow, what a beautiful card, great pic, lovely colouring and I love how you used vellum to add the sentiment, perfection
Thanks Sandi! 🙂
Oh Amy this card is absolutely gorgeous! Thank you for your inspiration!
Thanks so much Lynn! 🙂
Amy, this card is So Beautiful! Definitely worthy of a frame! I love this scene….SU did a bang up job with it! How fun that you used markers and a blender pen; I’ve never tried that~
Thanks Roberta! The markers add more ink a lot faster than using an ink pad with a Blender Pen. I basically scribbled the color on with the markers and then ran over it with a Blender Pen to smooth everything out. Super simple! 🙂
You really amaze me with your talent. The coloring is beautiful and the frame is perfect. Glad to see you on this hop!
Awww, thanks so much Karen! 🙂
Amy beautiful card. How did you miter the frame This is an awesome card.
Thanks Terry! It’s actually really easy to “miter” the frame. I just measured 1/2″ from either end of the two longer panels and made a pencil mark, then used my trimmer to cut it at an angle from the end to the pencil mark. I adhered the two shorter ends first and then added the longer side pieces over the top to give it the mitered look! 🙂
this is so peaceful and just beautiful….love the details and message!
Thanks so much Kathy! 😊
Gorgeous!
Thank you! 😊
Beautiful job creating that scene, Amy, and I love the wooden frame as well. That sentiment from Enjoy Life is my new favourite! Thanks for playing along with us at As You See It!
Thanks for stopping by to leave a comment! 🙂
Great card Amy! I love your layout and your colouring is fabulous x
Thanks so much! 🙂
This is simply stunning, Amy! Perfectly designed – perfectly colored – perfectly made! 🙂
Thanks so much Mary! 🙂
Great to have you joining us Amy, yoiur card is amazing, you colouring superb, and I had to look twice as that frame looked 3D!
Thanks Sue! 🙂
Oh WOW, such a stunning card!
Thanks Irene! 🙂
Absolutely love this, Amy!
Thanks Jenny! 🙂
beautiful card, Amy…I had overlooked this set in the new catty. will have to fix that asap as my club ladies will love this!
Thanks Jan! 🙂
What a lovely scene you’ve created, Amy! I have trouble doing “scenes”, but maybe even I could do this one, it’s already laid out for me, LOL! Your coloring is soft and serene and that sentiment matches perfectly! Thanks for sharing this with us at As You See It this week!
Thanks for stopping by to leave a comment! 🙂
Gorgeous card Amy! Love the verse added over the top of this beautiful scene using vellum.
Thanks so much Kirsten! 🙂