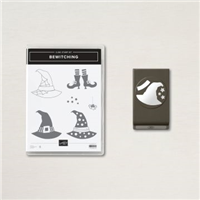
I used the Stampin’ Up! Bewitching stamp set bundle to create a Halloween card to share with you today.

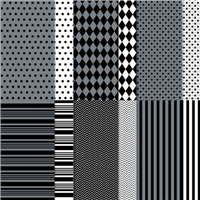
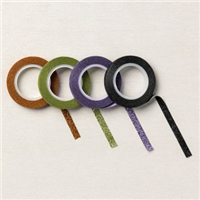
I started by adhering a panel of Black & White Designs DSP to a panel of Basic Black card stock with Stampin’ Seal. I adhered the layered panel to the front of a Basic Black card base with Stampin’ Dimensionals. Then I adhered strips of Glitter Washi Four Pack Washi tape to the card front.

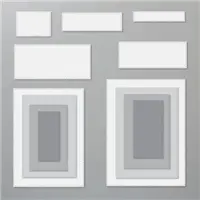
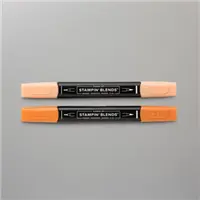
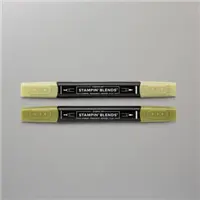
I stamped the feet image from the Bewitching stamp set in Tuxedo Black Memento ink on a panel of Basic White card stock. I colored the image with Light and Dark Pumpkin Pie, Old Olive and Highland Heather Stampin’ Blends Markers. I cut around the image with one of the Stitched Rectangle Dies and then adhered the die cut to the card front with Stampin’ Dimensionals. I stamped the hat image from the Bewitching stamp set in Tuxedo Black Memento ink on a panel of Basic White card stock and then colored the image with Light and Dark Pumpkin Pie Stampin’ Blends Markers. I punched the image out with the coordinating Witch Hat Builder Punch and adhered it with Mini Glue Dots to the card front.

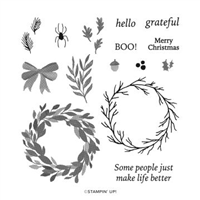
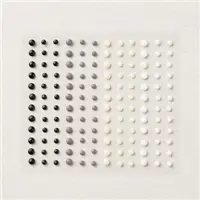
I stamped the star image from the Bewitching stamp set in Highland Heather ink on a panel of Highland Heather card stock and then punch it with the Witch Hat Builder Punch. I adhered the punched piece to the hat with Mini Glue Dots. I stamped the sentiment from the Cottage Wreaths photopolymer stamp set in Tuxedo Black Memento ink on a panel of Old Olive card stock. I cut the sentiment out with one of the Stylish Shapes Dies and adhered it with Mini Glue Dots to the card front. I adhered two of the Classic Matte Dots to finish the card front.

I adhered a strip of Black & White Designs DSP to a panel of Basic White card stock to finish the inside of the card.
I made this card out on Instagram this morning and you can see it here.
You can see a list of supplies used to create this project, including the card stock cuts, at the very bottom of this blog post.
I’ve created a printable PDF with written instructions and a list of products used to create this project. You can download, print and/or save it by clicking this image:
July 1-15 Host Code: MNSRZJMP
Use this host code when you order $50 or greater and receive a free gift from me! If your order is over $150, please do not use this code, but you’ll still get the free gift. The free gift is your choice of any item valued up to $10.00 in the 2022-23 Annual Catalog or July-December 2022 Mini Catalog! That includes some of the Host Exclusive stamp sets! See my Rewards page for full details.
Orders of $50+ placed through my online store also get my card class tutorials for the month! You can see the details on my Rewards page.
***Make sure that you can see my name on the final checkout page listed as your Demonstrator when you order so that you know that you’re ordering with me and you’ll get my rewards!
YouTube Live – 2:00 PM ET
I’m planning to go live on YouTube at 2:00 PM ET today! Stop by my YouTube channel today at 2:00 PM ET to see my project made with the Kindest Gnomes stamp set bundle! Look forward to seeing you then!
Stampin’ Up!’s July-August Sale-a-bration event going on now!
The July-August Sale-a-bration event from Stampin’ Up! has begun!! There are some awesome new products that you can earn for FREE with orders of $50+ and orders of $100+ placed between July 1 and August 31!

- Spend $50 or more and pick from 6 new products (2 stamp sets, 1 die set, 1 cards & envelopes pack and 2 designer paper packs!) that are available as free items!
- Spend $100 or more and pick from 3 new items (1 stamp set and paper bundle, 1 stamp set and one die set) that are that are available as free items!
HOST

- There is a new host exclusive stamp set called Perfect Pomegranates that will be available for FREE with either a personal order of $300+ or a party with sales totaling $300+ during Sale-a-bration!
- Drop me an email at amy@stampwithamyk.com if you’re interested in setting up a personal host code for you and your friends to see if you can collect orders to reach the $300 point to get that free stamp set!
JOIN

There is an AWESOME joining promotion happening during Sale-a-bration too! If you purchase the Starter Kit between July 1 and August 31, you’ll get the awesome Making Plans Collection for FREE with your Starter Kit!!
If you have any questions about joining, please drop me a note at amy@stampwithamyk.com, I’d be happy to chat with you! You can also see additional information on my blog here: https://stampwithamyk.com/join-my-team/ and on my Stampin’ Up! site here: https://amy_koenders.stampinup.net/join_now
If you need any stamping supplies, I’d be very happy to be your Demonstrator. Just click on the Order Stampin’ Up! Online Now button on the right side of the screen to go directly to my online store or drop me an email if you have any questions. Happy Stamping!

- Visit my online store here. Or scan the QR code below to go right to my online store via mobile device:

- Shop the Clearance Rack here.
- Earn FREE Stampin’ Up! Products – Join my Running Shoe Rewards Program – My online customer thank you program!
- Interested in purchasing a Starter Kit so that you can save at least 20% on every order that you place? Check out the details here.
- In addition to my online store, also take PayPal payments for orders – Check my Rewards page for more information.
- I offer gift certificates for Stampin’ Up! merchandise too! Click on my Gift Certificates page for more information.
- Follow me on:
Card stock cuts for this project:
- Basic Black – 4-1/4″ x 11″ card base scored at 5-1/2″, 3-3/4″ x 5″ panel
- Old Olive – Stylish Shapes die cut
- Highland Heather – Witch Hat Builder Punch
- Basic White – Stitched Rectangle die cut, Witch Hat Builder Punch, 4″ x 5-1/4″ panel (inside card)
- Black & White Designs Designer Series Paper – 3-5/8″ x 4-7/8″ panel, 5/8″ x 4″ strip (inside card)
Stampin’ Up! products used to create this project:
Price: $12.00






aw, such a sweet card, Love that huge hat
Thanks Sandi! 🙂
Fun card in perfect Halloween colors and patterns! Cute!
Thanks Linda! 🙂
Such a cute stamp set and another coming up this afternoon!
Thanks Karen! 🙂
How cute! Perfect colors and design! I’ll have to look again at that set! TFS
Thanks Susan! 🙂
This card screams Halloween & candy!! Love it
It’s such a fun stamp set! 🙂