
I used the Stampin’ Up! Scenic Garden Sale-a-bration host exclusive stamp set to create a birthday card for the Sunday Stamps color challenge this week.

Here are the colors for Sunday Stamps SSC301. Be sure to stop by the challenge blog to play along too!

The theme for my card was inspired by TGIF Challenge #TGIFC404.

And my card works for Tic Tac Toe Challenge #TTTC193. I went straight across the top.

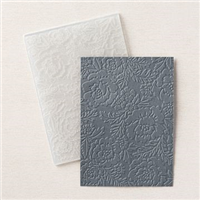
I started by embossing a panel of Basic White card stock with the Pretty Flowers Embossing Folder. I adhered the embossed panel to a panel of Basic White card stock with Stampin’ Seal and then to the front of a Thick Basic White card base with Stampin’ Dimensionals.

I stamped the cake image from the Scenic Garden stamp set (host exclusive set with orders or parties of $300+ during Sale-a-bration) in Tuxedo Black Memento ink on a panel of Basic White card stock and then colored it with Light and Dark Pumpkin Pie, Starry Sky and Blackberry Bliss Stampin’ Blends Markers. I cut the image out with one of the Framed Florets Dies and adhered it with Stampin’ Dimensionals to the card front.

I adhered a length of Starry Sky 1/8″ Metallic Woven Ribbon in a “z” to the card front with Stampin’ Seal. Then I stamped the sentiment from the Beautifully Happy photopolymer stamp set ($100 level Sale-a-bration item) in Blackberry Bliss ink on a panel of Basic White card stock. I punched the image out with the Double Oval Punch and adhered it with Stampin’ Dimensionals and Stampin’ Seal to the card front. I added three Pearl Basic Jewels to finish the card front.

I stamped the sentiment from the Beautifully Happy stamp set in Blackberry Bliss ink on a panel of Basic White card stock and then inked the cake image from the Scenic Garden stamp set in Starry Sky ink and it stamped off twice before stamping it next to the sentiment to finish the inside of the card.
You can see a list of supplies used to create this project, including the card stock cuts, at the very bottom of this blog post.
I’ve created a printable PDF with written instructions and a list of products used to create this project. You can download, print and/or save it by clicking this image:

January 16-31 Host Code: SB2SGK3H
Use this host code when you order $50 or greater and receive a free gift from me! If your order is over $150, please do not use this code, but you’ll still get the free gift. The free gift is your choice of any item valued up to $10.00 in the 2022-23 Annual Catalog or January-April 2023 Mini Catalog! That includes some of the Host Exclusive stamp sets! See my Rewards page for full details.
Orders of $50+ placed through my online store also get my card class tutorials for the month! You can see the details on my Rewards page.
***Make sure that you can see my name on the final checkout page listed as your Demonstrator when you order so that you know that you’re ordering with me and you’ll get my rewards!
If you need any stamping supplies, I’d be very happy to be your Demonstrator. Just click on the Order Stampin’ Up! Online Now button on the right side of the screen to go directly to my online store or drop me an email if you have any questions. Happy Stamping!

- Visit my online store here. Or scan the QR code below to go right to my online store via mobile device:

- Shop the Clearance Rack here.
- Earn FREE Stampin’ Up! Products – Join my Running Shoe Rewards Program – My online customer thank you program!
- Interested in purchasing a Starter Kit so that you can save at least 20% on every order that you place? Check out the details here.
- In addition to my online store, also take PayPal payments for orders – Check my Rewards page for more information.
- I offer gift certificates for Stampin’ Up! merchandise too! Click on my Gift Certificates page for more information.
- Follow me on:
![]()
![]()
![]()
![]()
Card stock cuts for this project:
- Thick Basic White – 4-1/4″ x 11″ card base scored at 5-1/2″
- Basic White – 3-5/8″ x 4-7/8″ panel, 3-3/4″ x 5″ panel, Framed Florets die cut, Double Oval Punch, 4″ x 5-1/4″ panel (inside card)
Stampin’ Up! products used to create this project:


Beautiful!! That is such a fun cake stamp!! Your card gives great inspiration to those who decide to play along with our new “Winter Bouquet” color challenge over at Sunday Stamps!! #SSC301
Thanks Deb! 🙂
how pretty, the dainty floral embossed background mirrors the beautiful florals on your cake. Nicely done
Thanks Sandi! 🙂
Amy, love how the clean and simple design of your card allows the flowers to take center stage and POP! Thanks for joining the Tic Tac Toe Challenge.
Thanks for stopping by to leave a comment! 🙂
BEAUTIFUL! The embossed background and the simplicity of the flowers are just perfect! Thank you for playing along 🙂
Thanks for stopping by to leave a comment! 🙂
Lovely pop of color on clean white background.
Thanks Heidi! 🙂
Amy, this is so pretty! Love that pop of color on all that white. Elegant and such a fun way to use the color combo!
Thanks Claire! 🙂
Love your mostly white card which makes the beautiful cake just pop! Very pretty, Amy.
Thanks Annette! 🙂