
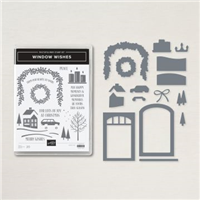
I used the Stampin’ Up! Window Wishes stamp set bundle to create a Christmas card to share with you today. I did a video tutorial for this card on Facebook Live yesterday and you can see it here. You can also see the video on YouTube here.

My card theme was inspired by the Inspire.Create Challenge #129.

I started by cutting a panel of Design A Daydream DSP (host exclusive item) with the “interior” window die from the Window Dies. I placed the die cut panel on the Thick Basic White card front and then marked the corners of the die cut lightly with a pencil. I stamped the snow and tree images from the Window Wishes photopolymer stamp set in Pool Party and Crumb Cake inks on the card front in the area that will show through the die cut. Then I erased the pencil marks.

I stamped the house and roof images from the Window Wishes stamp set in Blushing Bride and Soft Suede ink on a panel of Basic White card stock. I cut the images out with the coordinating Window Dies and then cut a panel of Real Red & White 6″ x 6″ Glimmer Paper with another one of the Window Dies. I adhered the die cuts with Stampin’ Seal and Mini Glue Dots to the card front. I adhered the die cut DSP panel to the card front with Stampin’ Dimensionals.

I cut panels of Basic White and Crumb Cake card stock with the window frames and sill dies from the Window Dies and then adhered them to the card front with Multipurpose Liquid Glue. I stamped the greenery and candle images from the Window Wishes stamp set in Old Olive, Real Red and Daffodil Delight inks on a panel of Basic White card stock. I cut the images out with the coordinating Window Dies and then adhered the images to the card front with Mini Glue Dots and Stampin’ Dimensionals.

I stamped the sentiment from the Window Wishes stamp set in Old Olive ink on a panel of Basic White card stock and then cut around it with one of the Stitched Rectangle Dies. I slid the die over and cut the sentiment image off with the same Stitched Rectangle Die. I adhered the die cut sentiment with Stampin’ Dimensionals and then cut another panel of Real Red & White 6″ x 6″ Glimmer Paper with the bow die from the Window Dies. I adhered the die cut with a rolled up Mini Glue Dot to finish the card front.

I stamped the sentiment and candle images from the Window Wishes stamp set in Mint Macaron, Real Red and Daffodil Delight inks on a panel of Basic White card stock to finish the inside of the card.
You can see a list of supplies used to create this project, including the card stock cuts, at the very bottom of this blog post.
You can see the YouTube video tutorial for this project here:
If you prefer to watch the video on Facebook, you can see it here.
I’ve created a printable PDF with written instructions and a list of products used to create this project. You can download, print and/or save it by clicking this image:

November 1-15 Host Code: 9NV2J63F
Use this host code when you order $50 or greater and receive a free gift from me! If your order is over $150, please do not use this code, but you’ll still get the free gift. The free gift is your choice of any item valued up to $10.00 in the 2022-23 Annual Catalog or July-December 2022 Mini Catalog! That includes some of the Host Exclusive stamp sets! See my Rewards page for full details.
Orders of $50+ placed through my online store also get my card class tutorials for the month! You can see the details on my Rewards page.
***Make sure that you can see my name on the final checkout page listed as your Demonstrator when you order so that you know that you’re ordering with me and you’ll get my rewards!
Past Paper Pumpkin Kits, Refills & Add-Ons On Sale Up To 50% Off November 9-10!

On November 9-10, all current Paper Pumpkin subscribers can save up to 50% on Paper Pumpkin past kits, refills, and add-ons!
Past kits, refills, and add-ons make perfect gifts for this upcoming holiday season. So you can get a headstart on holiday shopping now! Past kits don’t include a clear block, but blocks can be purchased separately (Clear Block D is the perfect size)!
Items are available while supplies lasts, order early! You won’t want to miss out on this amazing sale! Click here to head over to the sale beginning November 9 to pick up the great deals!
Fitting Florets Collection Available Now!

Add just the right touch of elegance to any occasion, including Christmas and seasonal celebrations, with the sweet Fitting Florets Collection. From color schemes to sentiments and embellishments to dies, these unique products blend together so that your cards and crafts fit whatever occasion you might need. Send birthday wishes, express your gratitude, or spread Christmas cheer—with so many options to mix and match you’ll be set no matter the celebration all year!
You can order items from the Fitting Florets Collection now. All items in the collection can be ordered separately.
The following exclusive products are only available while supplies last through January 4:
- Framed & Festive Cling Stamp Set (item 160888)
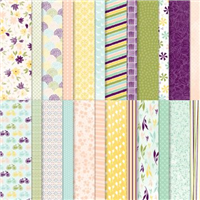
- Fitting Florets Designer Series Paper (item 161814)
- Gold Adhesive-Backed Swirls (item 161822)
The following will be available for purchase in the Mini Catalog starting January 2023:
- Framed Florets Bundle (item 162407)
- Framed Florets Photopolymer Stamp Set (item 161815)
- Framed Florets Dies (item 160623)

Head over to my online store here to pick up the Fitting Florets Collection of items today! You can find the items right here.
If you need any stamping supplies, I’d be very happy to be your Demonstrator. Just click on the Order Stampin’ Up! Online Now button on the right side of the screen to go directly to my online store or drop me an email if you have any questions. Happy Stamping!

- Visit my online store here. Or scan the QR code below to go right to my online store via mobile device:

- Shop the Clearance Rack here.
- Earn FREE Stampin’ Up! Products – Join my Running Shoe Rewards Program – My online customer thank you program!
- Interested in purchasing a Starter Kit so that you can save at least 20% on every order that you place? Check out the details here.
- In addition to my online store, also take PayPal payments for orders – Check my Rewards page for more information.
- I offer gift certificates for Stampin’ Up! merchandise too! Click on my Gift Certificates page for more information.
- Follow me on:
![]()
![]()
![]()
![]()
Card stock cuts for this project:
- Thick Basic White – 4-1/4″ x 11″ card base scored at 5-1/2″
- Crumb Cake – Window die cut
- Basic White – seven Window die cuts, Stitched Rectangle die cut, 4″ x 5-1/4″ panel (inside card)
- Real Red & White 6″ x 6″ Glimmer Paper – two Window die cuts
- Design A Daydream Designer Series Paper – 4″ x 5-1/4″ panel
Stampin’ Up! products used to create this project:

Price: $18.00


Very pretty window scene!
Thanks Linda! 🙂
Goodness, what a sweet card and I love your color choices, they are perfect together
Thanks Sandi! 🙂
Really like this card. I can’t wait to make it! Thank you for your great tips- they really help.
Thanks Barbara! 🙂