
I used the Stampin’ Up! Festive Post and Festive Corners stamp sets to create a Christmas card to share with you today. I did a video tutorial for making this card on my Facebook page yesterday. I’ve also uploaded it to my YouTube Channel so you can view it there too!

My card design was inspired by Mojo Monday 545.

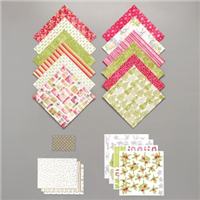
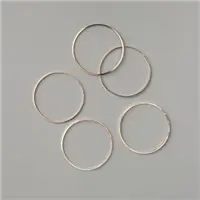
I started by adhering a panel of Most Wonderful Time DSP from the Most Wonderful Time Product Medley Refill to a panel of Old Olive card stock with Stampin’ Seal. Then I adhered a wide strip of the Most Wonderful Time DSP to the larger DSP panel with Stampin’ Seal. I adhered one of the Gold Hoops Embellishments with Glue Dots (hidden under the card stock layering) to the DSP panel and then adhered the layered DSP to a Soft Suede card base with Stampin’ Dimensionals.

I stamped the deer image from the Festive Post photopolymer stamp set in Soft Suede ink on a panel of Crumb Cake card stock and then punched it out with the coordinating Rectangular Postage Stamp Punch. I stamped the postage and snow images from the Festive Post stamp set in Real Red and Whisper White Craft Ink on the Crumb Cake card stock punch. Then I cut a panel of Soft Suede card stock with one of the Stitched So Sweetly Dies and then used that same die to trim the panel down about 1/4″. I adhered the punched image and die cut panels together with Stampin’ Seal and to the card front with Stampin’ Dimensionals.

I tucked two of the stickers from the Most Wonderful Time Product Medley Refill under the postage stamp image and adhered them to the card front. I punched the end of a strip of Whisper White card stock with the Banners Pick A Punch and then stamped the sentiment from the Festive Corners photopolymer stamp set in Real Red ink on the banner. I adhered the banner with Stampin’ Dimensionals to finish the card front.

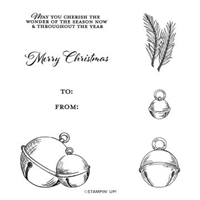
I stamped the sentiment from the Cherish The Season stamp set in Real Red ink on a panel of Whisper White card stock and then adhered a strip of the Most Wonderful Time DSP to finish the inside of the card.
You can see a list of supplies used to create this card, including the card stock cuts, at the very bottom of this blog post.
You can see the video tutorial for creating this project on my YouTube Channel here:
Or you can watch it on my Facebook page here.
I’ve created a printable PDF with written instructions and a list of products used to create this card. You can download, print and/or save it by clicking this image:

September 16-30 Host Code: XT2ZENTN
Use this host code when you order $50 or greater and receive a free gift from me! If your order is over $150, please do not use this code, but you’ll still get the free gift. The free gift is your choice of any item valued up to $10.00 in the 2020-21 Annual Catalog or August-December 2020 Mini Catalog! That includes some of the Host Exclusive stamp sets! See my Rewards page for full details.
Inkin’ Krew World Card Making Day Facebook Event – Saturday, October 3!

Woohoo!! We’re doing it again!! Our team will be hosting a fun all-day event on Saturday, October 3 for World Card Making Day!
All are welcome to join us! We’ll be setting up a Facebook page to host the event and we’ll be sharing the link to the page in late September. Keep an eye out on my Facebook page and blog for more details! Can’t wait to stamp with you all then!!
Stampin’ Up! Get & Go Starter Kit Promotion – September 1-30!

The Get & Go Starter Kit promotion gives those who sign up to be a Stampin’ Up! demonstrator additional products to help get started right away! In addition to the already great valued Starter Kit, you will receive precut paper, stamps, and embellishments to use either in your first event or to create a stash of pretty cards to share!
Here are the details:
- Promotion Dates: September 1–30, 2020
- Joining Deadline: September 30, 2020; 11:50 PM (MT)
- New demonstrators who submit their Independent Demonstrator Agreement (IDA) before 1 September or after 30 September will not be eligible for this promotion.
- In addition to the regular starter kit (for $99 you choose $125 worth of products), if you join between September 1 and 30, you will also receive enough card stock pieces to make 16 cards, a pack of Rhinestone Basic Jewels, the So Much Love stamp set, and the Queen Anne’s Lace stamp set!!
- 8 packs of precut card stock of the coastal cabana pack will be provided, and 8 packs of precut card stock of the Granny Apple Green pack, for a total of 16 cards (packs include envelopes).
- Important note: Ink, adhesive, cutting tool, and clear block for stamping must be purchased separately. However, these products may be included as part of the Starter Kit product selection.
This is such a great deal! For $99, you get to pick $125 merchandise of your choice for your Starter Kit plus you’ll get the Queen Annes’ Lace and So Much Love stamp sets, card kits to create 16 cards and a pack of Rhinestones for free!!
Drop me a note at amy@stampwithamyk.com if you have questions about joining, I’m happy to chat. You can also see more information about the benefits of becoming a Stampin’ Up! Demonstrator here.
If you need any stamping supplies, I’d be very happy to be your Demonstrator. Just click on the Order Stampin’ Up! Online Now button on the right side of the screen to go directly to my online store or drop me an email if you have any questions. Happy Stamping!

- Visit my online store here.
- Shop the Clearance Rack here.
- Earn FREE Stampin’ Up! Products – Join my Running Shoe Rewards Program – My online customer thank you program!
- In addition to my online store, also take PayPal payments for orders – Check my Rewards page for more information.
- I offer gift certificates for Stampin’ Up! merchandise too! Click on my Gift Certificates page for more information.
- Follow me on:
![]()
![]()
![]()
![]()
Card stock cuts for this project:
- Soft Suede – 4-1/4″ x 11″ card base scored at 5-1/2, Stitched So Sweetly die cut
- Old Olive – 3-3/4″ x 5″ panel
- Crumb Cake – Rectangular Postage Stamp Punch
- Whisper White – 1/2″ x 3-3/4″ strip, 4″ x 5-1/4″ panel (inside card)
- Most Wonderful Time Designer Series Paper – 3-5/8″ x 4-7/8″ panel, 2″ x 4″ panel, 5/8″ x 4″ strip (inside card)


I can’t tell you how many times I’ve looked at the catalog and don’t remember seeing that stamp set. You brought it to life! Love those gold hoops!!
Thanks Karen! 🙂
So festive! I love your colors and take on the sketch. I keep resisting that postage set but this is wearing me down!
Thanks Susan! No need to resist…just get it. 😉
oh I really like this one, love that little dear in the stamp style, perfect collage card
Thanks Sandi! 🙂
Very nice and festive. I like the way you chose to do the sketch with rectangles instead of circles. The Gold hoop is a neat embellishment and I really like the Postage Stamp look.
Thanks Ida! 🙂
This is so pretty! So glad you could join me for Mojo Monday!
Thanks for stopping by to leave a comment! 🙂